How do your filters keep you from getting the shot? by Andrew Dacey

This past weekend I participated in Scott Kelby's Worldwide Photo Walk. We had pouring rain predicted for the entire weekend so the walk leader had come up with a rain plan to shoot in a local museum, The Maritime Museum of the Atlantic. I hadn't visited that museum in years so it was fun to walk through and look at all the nautical displays. I had fun shooting some abstract shots of a light house lens and also working with some detail shots of the displays. I tend to enjoy shooting abstracts so this was a lot of fun for me. I even tried some handheld HDR shots as the lighting was a little challenging in some situations.

However, other people in the group found the location to be more challenging and this made me think about how our own filters can really limit ourselves from getting the shot. One example of this was that one of the participants commented that he was having a tough time because he was trying to stay at 800 ISO on his camera because the noise wasn't great above that. Now I can't comment on the noise performance for his particular camera (a Nikon D5000) but this really stuck with me. Yes, maybe the noise does get worse above 800 on his camera, however it might also open up possibilities in the difficult lighting. I can't say for certain if he did pass on shots because of this but I did catch myself thinking that way from time to time. I was also trying to stick to around 800 as my "base ISO" in the shooting conditions and I did catch myself thinking at times that my shutter speed was going to be too low to handhold the shot. However, what I tried to do was to catch myself whenever I thought that way and would adjust my ISO. In some parts of the museum I had to go as high as 3200 and arguably could have gone higher. Now I shoot with a Nikon D700 which has incredible high ISO performance but the point is that I decided that getting the shot was more important than the noise. Are the 3200 shots noisier than the 800 shots? Absolutely, but I actually have a shot. I could have easily dismissed the possibility because I'd have to increase my ISO above what I considered "acceptable".

Since the walk I've thought a little more about this and applied it more broadly. Settings are one thing, but what about subjects or entire locations? How easy is it to dismiss a scene as not having anything worth shooting? Once you've put that filter up how likely is it that you won't find anything worth shooting? Even something did present itself would you catch it or would your filter keep you from seeing it?

Don't get me wrong, sometimes that filter is based on experience and a serious evaluation of the scene (conscious or unconscious). However, sometimes that experience can be a double-edged sword. Sometimes we just need to silence that internal critic saying that the shot won't work and be open to the possibility that there is something there. Will it always work? No, but sometimes by opening yourself up to the possibilities presented by a scene you can end up surprising yourself. I know I'm going to try to be more aware of my own filters and giving myself permission to experiment, even if it does mean I fail miserably.

HDR mistake by Andrew Dacey

Okay, this one may be obvious to some, especially if you have more HDR experience. But, I figured I'd share it here figuring that if I've made this mistake then someone else is probably unaware of this too. So what was this mistake? It's pretty simple but if you're setting up your HDR shot using auto-bracketing then make sure to pay attention to what your Camera's meter is going to use for the base exposure. I was shooting in aperture priority mode and shooting into a light. Because of this my camera was tending to pick a very high shutter speed to start (exposing for the light). This was a great exposure as part of the bracket but should have been the highest shutter speed in the bracket, not the middle. Adding shutter speed above this wasn't bringing in any further detail. In some cases I even ran into multiple shots in the bracket being shot at 1/8000 since that's the maximum shutter speed on my D700. Obviously that defeats the purpose of the bracketing and this usually meant that I didn't have the slower shutter speeds I needed to bring in the shadow detail. What I should have done was picked a good middle exposure (either with exposure compensation or by switching into manual mode) and started my bracket there.

It happened to me so it could happen to you too, pay attention to your exposure!

Back in action by Andrew Dacey

Well the splint came off a few weeks ago and I think my recovery is doing quite well. My hand is still weak and stiff at times but overall I'm feeling pretty good and have been happy with my recovery. The one thing I am finding tough is getting back into the routine with some things after such a long break. Fortunately, I am building up a list of ideas I'd like to post on and I have some other new developments that I hope to share with my readers in the next few weeks.

More to come.

Slight hiatus by Andrew Dacey

Going to be taking a bit of a summer hiatus for the blog. I'm currently in the middle of renovations on my house and this last week I broke my hand which makes typing a lot slower. My recovery should take roughly 5 more weeks or so. I'm hoping to still get some posts out during that time but the posting frequency is definitely going to be reduced.

Thanks to all more readers, I hope to have more for you soon.

You backup your files, what about your power? by Andrew Dacey

I've been talking a lot about backup lately, and it's an important subject. However, one area tends to get overlooked and that's power. You might be backing up your files but what happens if the power goes out and you lose a pile of work? Surge protectors can be good for protecting you against power surges but if you want to survive a power outage then you need a UPS (uninterruptable power supply, not the courier company). I'll admit that this is one area where I'm a little weaker in too. Finding out good information about how big of a UPS you need is pretty tough. You don't want to have to buy more than you need but you definitely don't want to underestimate your requirements either.

I solved the problem of how big of a UPS I needed by buying one that has a display on the front that shows me how loaded the UPS is, as well as other handy things like the current voltage coming into the UPS. This is great for the piece of mind as I can visually see that I tend to hover below half way on the UPS, telling me that I have plenty of headroom. If I start running some other peripherals then I do see the graph go up higher but so far I seem to be well within the safety zone.

One thing to also watch out for is that most UPSs have a mixture of battery protected outlets and surge protected outlets. Only the battery protected outlets will stay on in a power outage so make sure that you understand how many outlets of each type your UPS has. I thought that I had enough battery protected outlets but it turned out that the power bricks on some of my peripherals blocked some of the outlets and that limited what I could put on battery. In my case, that means that if the power goes out then I'm going to lose my internet connection. Ideally, I would have liked to have that on battery but choosing between it and my external hard drive was an easy decision.

That does bring up the point that not everything needs to be on battery, and that's where the surge protected outlets come in handy. For instance, in a power outage I'm not going to be too concerned about my scanner being out of commission. The main point of a UPS is not to keep you up and running indefinitely, it's meant to give you the time to save your work and shutdown safely. This would be why I opted for the external drive rather than my internet connection, right now I don't tend to work under tight deadlines where I'd need to transfer files so I'd much rather make sure my Time Machine drive was safe.

Aside from the obvious power outages, a UPS can be great for protecting your gear against voltage drops as well. In my case, I live in an older house and when some appliances turn on the lights will dim. I used to not think anything of it but once I plugged in my UPS I started hearing it kick in briefly whenever this would happen and I could see the voltage drop on the display. I'm not certain if I was potentially doing damage to my equipment before this but it's certainly reassuring to see that my UPS will react that quickly and is protecting my computer now.

So invest in a little piece of mind and look into getting a UPS for you machine, it's not a glamorous piece of hardware by any stretch of the imagination but the first time it saves your butt when the power goes out you'll start singing its praises.

So when do you re-sample? by Andrew Dacey

A quick follow-up to my post a few weeks ago on dispelling the 72dpi myth. In that post I mostly focused on the intricacies of resolution and why 72dpi doesn't really make sense. The one thing I left off from that post is when do you need to worry about resolution? Or more accurately, when do you re-sample? One of the comments from my post on the 72dpi myth talked a lot about images being resolution independent. As long as you're not changing the pixel dimensions (either adding or discarding pixels) you can freely change the resolution of the image, with no degradation of quality (or change to the file size). The point is that it's all about dimensions. When you're working on screen, you only have pixel dimensions to work with. When you're printing, then you can start thinking in terms of inches (or centimetres if you work in metric). The resolution only becomes an issue then when you're printing.

I think most of the confusion around resolution comes from the idea of re-sampling. Throw that into the mix and suddenly things seem to get really confusing when they shouldn't. Re-sampling really only does 1 of 2 things, it either makes up pixels  or throws them away. So when do you use it?

Making something bigger

Sometimes you may need to increase the number of pixels for an image. Maybe you're trying to scale up the image on screen larger than the original. Or maybe you're going to print a very large print and have determined that the resolution will be too low if you don't scale things up. In both of these cases, re-sampling is your option. There are other tools available for this but they essentially all do the same thing, they increase the image to a target size while maintaining a target resolution.

Making something smaller

These days probably the much more common case will be that you want to make an image smaller. If you're shooting full-res images with your camera you almost certainly want to shrink them down before posting them on-line. For making things smaller we're almost always talking about pixels, you rarely have to worry about an image being too high resolution for printing, unless you're sending the files to a lab and they have a file size restriction.

Save your master files!

That's really about all there is too it, don't worry about re-sampling unless you're making something bigger or smaller. Even then, simply worry about what is important to you. If you're reducing the size for the web then it's only the pixel dimensions you'll have to worry about. The last thing is though, make sure to save a copy of your file in its original resolution before you re-sample. Whenever you re-sample you're going to degrade the quality so you're going to want to make sure to keep your master files untouched when you do this. Make sure that you're saving a copy of the re-sized file.

Lightroom makes all of this easier

Adobe's Lightroom does make this a lot easier, you're not touching your original files for starters. Plus, you only deal with resolution when you export or when you print. If you're exporting for the web, just set the pixel dimensions you want. If you're exporting files to send to a lab, then just set your physical dimensions and your desired resolution. In both cases, Lightroom will do the appropriate re-sampling if necessary during the export process. I don't have any experience with Apple's Aperture but I would imagine that things work similarly for it.

Department of redundancy department by Andrew Dacey

Today's post is all about redundancy. Today's post is all about redundancy. Okay, I think I've beaten that joke to death. Seriously though, I've already hit on RAID and that is one form of redundancy but when you're running a business and time is money there's still a lot more to think about in terms of redundancy. Big businesses tend to get pretty paranoid about redundancy. At my day job, everything that's in production is supposed to be fully redundant. We install our servers in pairs that are in different physical buildings, which are often quite a distance apart (if not in a nearby town). My understanding is they even go as far as making sure that the fibre optic cabling from the data centres to the ISPs (and yes, they use more than 1) don't have any points in common. The idea here is that 1 of this buildings could completely go offline and we should be able to have things up and running at the other location as quickly as possible. The other piece of this puzzle is to ensure that whatever took down the first site should not impact the other.

Now this may sound like overkill, the company I'm under contract for is a large financial services company in the US, they have literally millions of dollars on the line if there's an outage so they need this level of protection right? You're just a small self-employed photographer so you don't need something that elaborate right? Wrong. While you may not have to get as paranoid about redundant fibre links and such consider the impact of an outage to your business. While it may not number in the millions it doesn't have to in order to bring your business to its knees. You might only lose out on a few thousand dollars from a missed deadline but how easily can you absorb that loss? So what's your plan if something goes south?

Computers

Let's start with the basics, what happens if your computer dies on you? I've already covered backup options previously but this goes a little further than that. Suppose you're under the gun on a big deadline and the power supply on your computer dies. I'll assume here that you've got a killer backup strategy so you've only lost any changes since your last save (you do save frequently don't you?). Okay so your files are safe but that doesn't do you any good if you don't have a computer to pull them up on now does it? If you're a larger studio then you probably have more than 1 computer in the studio so that's a viable solution. Or how about a laptop? Worst case scenario, do you have a home computer that you could press into service (you are keeping your work computer separate from your home computer right?), does it have all the necessary software installed? Can it get the files you need?

Internet Service

It's a couple hours until your deadline, you just need to upload them to the client's server, but your internet connection has just dropped. You call up your ISP and find out they need to send out a technician to investigate the issue and since you're a residential customer that's going to be 3 days from now. Okay, first of all, what the heck are you doing running your business on a residential internet connection? Yes business internet accounts tend to be a lot more expensive but they usually carry with that expense a higher priority when it comes to outages. Even if you have a business account maybe it's still too long to wait to get it fixed. Do you have a 2nd internet connection with another ISP? If you have a studio separate from your home can you use your home broadband connection? If so, is it with the same provider? What do you do if the outage isn't a problem on your end but is due to a backhoe cutting the ISPs main fibre connection, cutting off the entire city's customers? Sound far fetched? I've seen it happen. Okay, so work and home internet connection are out of the question. Well, can you use your cell phone's data plan to upload the files (probably painfully slow but I'm talking desperation time now)? Or how about the coffee shop's wi-fi connection? Again, probably not the fastest option but could work in a pinch.

Physical location

This one is really tough for the small business. If you have a separate studio then the obvious option is to work out of your house. More importantly though, this really hammers home the importance of having at least 1 offsite backup for your files. If a catastrophe like a fire hits you most likely have other immediate concerns on your plate but you've also lost your livelihood if you're a full-time photographer. How long until insurance pays out? How do you keep your cash flow running in the meantime. Getting back to work might be the furthest thing from your mind but it may be a necessity in order to keep the money flowing.

You

I'll wrap up my thoughts with asking what happens if you're incapacitated or worse? Obviously if you're a one person shop then you're future bookings are more than likely off. But, do you have an assistant that can fill in for you? What about your partner or spouse, how much of the books do they know in order to sort things out if you can't? For that matter, are they even authorized to do so? Worst case scenario, if you die how well protected is your family in terms of not being burdened with a huge debt from you and how able will they be to make a living off your legacy of images? I know it's not a fun topic to think about but how would your feel if your family had no way of benefiting from the wealth of the images you've created over your career?

Test, test, test!

My final closing words will be that whatever options you deem necessary, make sure you test them! With my day job we're required to completely power down each of our major data centres on an annual basis. This is a literal powering down of the building. This forces us to make sure that nothing have slipped in that only runs in 1 data centre or can't be easily failed over. Similarly, it forces us to prove that we can keep fully operational while 1 of the data centres is out of commission. Similarly, this policy can even extend to key people in the company, it's not as frequent but many staffers are required to go on mandatory vacation. During the period of mandatory vacation their access is turned off so that they can't log onto any systems. There are some safeguards in place that can allow them to get it back if necessary but the purpose is to demonstrate that they can be gone for a period of time and things won't fall apart without them. I'm not saying you have to go to all of these extremes but make sure you do test out your redundancy plans before you find yourself having to rely on them.

Dispelling the 72 dpi myth by Andrew Dacey

I first wrote my article explaining the difference between DPI and PPI around 10 years ago. To put it in perspective, it originated as a post on Usenet. I posted that article mainly to help clear up the difference in the terms because I was frequently seeing them misused. Way back then I'd always planned a follow-up article on what I like to call the "72 dpi myth". This week's Tech Tuesday instalment seems as good a time as any to finally complete the follow-up piece to that article. Okay, so what the heck is the 72 dpi myth? It's really more of a collection of incorrect ideas about resolution and how it relates to screen display. One of the more common places you'll see it is people recommending to save your images at 72 dpi when posting online. The usual reasoning for this is so that the images are only good for screen display and don't have enough resolution for a good sized print. There are other variations which often quote 72 dpi as the resolution that all images are displayed on screen.

First things first, strictly speaking we're talking about pixels per inch (ppi) not dots per inch (dpi). I'm calling this the 72 dpi myth because that's how I most often hear it. But this post isn't about the terminology, I already have an entire article devoted to that. My concern today is how this myth perpetuates a misunderstanding about resolution. At best, this spreads ignorance and confusion. At worst it can lead people to think that their web images are too low resolution to be of any use from a would-be image thief when they're actually posting very high quality images.

Readers of my DPI vs. PPI article should already understand the issue here; pixels per inch only matters when you're printing. On screen the only thing you have to worry about is the pixel dimensions. The ppi setting does absolutely nothing on-screen! If you're concerned about posting images that can't be printed very large then all you need to do is worry about the pixel dimensions. Do some quick math to figure out what size you could print the image at an acceptable quality. I'd say 150 ppi is about as low as you can go and get any kind of reasonable quality for a smaller print. So with that figure in mind, an image that's 600 pixels on the wide side would only end up being 4" on the long side. I don't think most people are too concerned about people making postcard-sized prints so this can be a good starting point. I'm not trying to throw out any hard and fast rules though, I post my pictures on my stie at larger sizes than that and I'm not overly concerned. Some people are worried even about this size and won't go above 400 pixels on the long dimension. Figure out your comfort level and go from there.

My point here is that on the screen it's all about pixel dimensions, not the ppi setting. The ppi setting is just a small piece of information that goes along with the file to say how large the image should be printed. However, that can be changed at any time without any loss of quality as long as you're only adjusting the ppi setting and not re-sampling. For example, if I were to post a full 12 megapixel image from my D700 it's not going to matter whether I set the ppi to 72 or 300 or something even higher, it's still a full-size image!

If this is still unclear let's look at this from the other direction, screen displays. The statement that all computer screens display at 72 ppi is dis-proven with a simple examination. Look at standard monitor resolutions; in the old days of 4:3 monitors you had resolutions like 1024x768, 1280x1024 and 1600x1024. In these days of wide-screen displays you see resolutions like 1440x900, 1920x1080, etc. Notice that in all of these examples I'm only talking about pixel dimensions, not the size of the screen. Suppose you have 2 wide-screen monitors, a 19" and a 24", if both are using the same resolution of 1440x900 then clearly the larger monitor is displaying at a lower resolution. Perhaps the best way to really hammer this home is with televisions since they're displays just like computer monitors. "Full HD" is 1080p (1920x1080). Walk into an electronics store and find the smallest 1080p TV you can find, it's probably going to be somewhere in the 30" sizes, now compare that to a 60" TV or bigger that's still displaying at 1080p, or how about some 100" projection screen that's 1080p too. Are you honestly going to say that all of them are displaying at 72 ppi? Clearly they aren't.

More recently I've even stumbled across a new version of this myth that's specific to the iPhone and iPad where higher resolutions (132 ppi for the iPad, 326 ppi for an iPhone 4G) are recommended for these displays. Hopefully by now you can dismiss this advice based on your understanding of resolution. Again, all that matters is the pixel dimensions. If you're concerned with iPhone or iPad display then just go by the pixel dimensions and figure out what you want to use from there (remember though that higher resolutions will allow for zooming). I think some of the confusion here comes from Apple publishing the ppi specs for their displays but recognize that's only useful for comparing with another device's display if you're interested in which display has the higher resolution.

Rollback by Andrew Dacey

What do you do when a "routine" upgrade goes bad? How about a "minor" change to your website that breaks the whole site? How quickly can you recover? Can you even recover? This week's Tech Tuesday feature is all about rollback options. I've spent the last few weeks talking about back-up options. That's a topic that should already be pretty familiar to most people. This week I want to talk about something that's probably a littler further afield for most photographers and other small business operators, the concept of rollback.

In my day job I work as an IT consultant working on a contract for a very large financial services provider in the US. In that environment all changes to the production environment are highly controlled. This is both for regulatory reasons and to ensure that the change won't have an unforeseen affect on trading operations. This means that every change has to be very well planned in advance including when the change will be made and the steps that will be performed. This change request then goes through several levels of approval before you're finally allowed to make the change. Even then, that change is only approved for the time that you said you would do it and should only include the work that you said you would do. Can this be very bureaucratic? You bet. Does it eat up a lot of time? It sure does. But, when a change going wrong can cost the firm millions of dollars it makes sense.

I'm certainly not going to suggest that this level of planning or scrutiny is necessary for a single photographer or a small studio, it just doesn't make sense. However, there is one big piece of this process which does have a lot of value for even the smallest businesses. Aside from describing the steps that will be taken in the change we're also required to provide a backout (or rollback) plan. Essentially, for every change request we have to say what we'll do if the sh*t hits the fan. No rollback plan? No approval. No matter what size your operation is, this is a mindset you need to start adopting. It's one thing if your home computer is out of commission for awhile but if it's your work computer then that's lost revenue.

Let's look at a current example, Apple recently released Final Cut Pro X. You take a look at the features videos and think it looks awesome and gleefully install it. Then you find out that it won't work with projects from Final Cut Pro 7. Oh, and your plug-ins don't work any more either. Now what? That's when you decide how much of a big deal that is to you and make the call on whether you can live with that or if it's time to initiate your rollback plan. You did make a rollback plan right? No? Well then I guess you're stuck with living with it.

The thing is, rollback doesn't have to be anything elaborate. If you always keep a bootable back-up drive then it can be as simple as making sure that back-up is up to date prior to making significant updates or other big changes. That way if anything goes wrong you can simply boot off that back-up (remember to test this first!) and then use that back-up to restore back to that good state.

Or, if you have multiple systems then maybe you just need to try out an update on a system that you can afford to have out of commission if things go south. If you have both a desktop and a laptop then figure out which one is more important to you right now and try out the update on the other one first. If things don't go well then at least your main system isn't affected and it buys you time to fix the other system. Strictly speaking, that's not as good of a rollback option but at least you're thinking, "if things do go bad how do I keep working?"

Rollback is all about having a quick way to get out of trouble. If you can't handle being down for a few hours to a few days while you reinstall everything (and really, who can these days?) then I strongly urge you to start thinking about how to protect yourself when making changes.

Mirrors, snapshots and incremental back-ups by Andrew Dacey

Following up on the back-up theme from last week's Tech Tuesday post, RAID is not Back-up, I'm going into a little more depth on some back-up options and what each of them offers. This week I want to talk about 3 very popular options; mirrors, snapshots and incremental back-ups.

Mirrors

This is really a bit of a follow-up from last week's discussion on RAID vs. back-up. One very common RAID level is RAID 1, also known as a mirror. This involves taking 2 identical disks and setting them up so that whatever is written to 1 is written to the other disk at the same time. As mentioned last week, this is great for reliability and that's why I'm including it here as part of a back-up strategy. The idea is 1 of the drives can fail and you'll still be up and running with the other drive. As mentioned last week, this is great for protecting you against drive failures but it doesn't help you recover an individual file. If you accidentally change or delete a file it's going to be changed on both drives.

There is another type of mirror that doesn't involve RAID. Rather than setting up a RAID you can keep a second disk which is an automatic back-up of the main drive. The idea here is very similar to RAID 1 but the copying would be less frequent. With RAID 1 all changes are written to both disks at the same time. Instead, you could setup your mirror drive to be written to every hour, or possibly just at the end of the day. The big advantage is that if you do accidentally delete a file you can still find it on the mirror drive. The other advantage is that you can turn off that mirroring when you are making major changes (such as installing updates) and want to make sure that you can back out of the changes if necessary (more on this next week).

Ideally, you should be able to boot your computer from this mirror. That's extremely useful if an update goes catastrophically wrong and your main drive is in an unusable state. I don't want to get into a Mac vs. PC debate but this is one area that is significantly easier to manage on a Mac since you can always startup off of any drive that has Mac OS X installed and you don't run into any issues with drive letters changing or similar. I'm not saying it can't be done on a PC, there just may be more involved in setting it up.

The big downside of this variation is time. It takes a lot longer to copy over all of the data. In order to ensure that all of the data is exactly the same the mirror should take a complete copy of the original disk, you can't really reliably just copy things that changed. The idea is that every byte on the back-up drive should be identical as the first drive and that requires a lot of time to copy and verify.

Snapshots

A snapshot is pretty much what it sounds like; it's a back-up strategy where you take an exact copy of the drive as it is right now. Depending on your back-up software this may be a compressed copy or simply a full copy of all of the files stored in a folder on another disk. The big advantage over a mirror (especially a RAID 1 mirror) is that you should be able to recover a file that you accidentally changed, just grab it from the snapshot. The exact steps involved with this will depend on your back-up software.

Obviously one of the big disadvantages for this strategy is disk space. If you have 2TB of data and take a full snapshot of that data every day then even after a single week you'll need 14TB to store that! That's one of the main reasons why back-up software will normally compress the back-up. This will add some time in creating the back-up and in restoring any particular file but the savings in storage space may make it worthwhile.

Typically, when working with snapshots you'll setup some type of strategy for rotating out old copies. One common strategy is to take a daily snapshots and then only keep 1 snapshot from the previous weeks going back a month and then only keep a single monthly snapshot going back to whatever period you feel you'll need. A lot of this can depend on how much data you have and how far back you may need to go. Yes, this can take up a lot of space but don't underestimate the value of being able to go back a few days, or even weeks, when it's some time before you realize that you deleted the wrong file.

Incremental back-ups

Incremental back-ups are often combined with snapshots. As outlined above, snapshots can take a lot of time to create and eat up a lot of space. Instead of creating a full snapshot every day most back-up software can instead create a full snapshot less frequently and then simply save a back-up of any files that have changed since the last back-up separately.

Obviously this can save a significant amount of space, how much will depend on how many files you change (or new files you create) in between back-ups but it's always going to take up less space than a full snapshot. The big downside is you don't have a full snapshot of the state of your disk as often. This can prove to be a major issue if the last snapshot turns out the be bad. For example, suppose that you take weekly snapshots and then do incremental back-ups throughout the week. If it's day 6 of your incremental back-ups when your disk fails then you may be faced with losing a lot of last week's work. The other downside is that it can take your back-up software a lot longer to restore all of your files as it first has to restore the snapshot and then step through each incremental back-up from that point.

So where does Time Machine fit into all of this?

So far I've tried to stay more theoretical but since every recent version of Mac OS X includes Apple's Time Machine software for backing up I thought it was important to touch on it a little bit, especially because it doesn't really fit into any of the options I've outlined above.

Essentially, Time Machine does a bit of a mix between a snapshot and an incremental back-up. When Time Machine runs for the first time it makes a complete copy of the contents of the drive(s) you're backing up. After that, it runs periodically (hourly by default) and makes a new copy of any files that have changed since the last time it's run. So far this sounds a lot like an incremental back-up right? The big difference is that due to the way Time Machine stores the files you will always be able to get to all of the files as they looked at that particular point in time, even those that haven't changed. This makes it look a lot like you're taking full snapshots every hour since you see all of your files.

The important thing to realize is that while you can see all of your files for each time that Time Machine ran, it only writes a new copy of files that have changed. This means that while all of the unchanged files show up for that time period they aren't a separate copy, they're the exact same file as was written to the disk when that particular file changed, or potentially going all the way back to the initial snapshot. This does save a ton of space and it's a great piece of engineering to make restoring files easy but it's important to realize you will only ever have 1 copy of any change for a file.

When you get right down to it, Time Machine is really a system where a single snapshot is taken right at the beginning and everything after that is an incremental back-up. Don't get me wrong, Time Machine is a great back-up solution because of how simple it is and because Apple has done an incredible job of making back-up simple enough for everyone. The big thing to realize is that it should only be part of a complete back-up strategy that employs other options like those I've outlined above.

It's probably easiest to illustrate the potential issue with an example. Suppose you accidentally delete a file that you last worked on over a month ago. When you go back an hour in Time Machine and restore the file you discover that the file is corrupted. You don't panic right away because you think, "that's okay, I'll just go back further". But, you're sunk, the last time this file was written to Time Machine's back-up drive was a month ago when you last worked on it. While it will look like you have several copies of that file since then each of those will be the same corrupted file that you restored the first time. If you're lucky then you'll have another back-up in Time Machine from before the last set of changes that you made but then you're going to lose whatever those changes were.

Test your back-ups!

A final word on back-ups; if you're not testing your back-up strategy periodically then you really don't have a back-up strategy. A proper back-up strategy should always be tested. That doesn't mean you should format your main hard drive every week but at times you should be testing to make sure that you can restore your system from your back-ups. It's a terrible feeling to think that you're properly protected when your system fails only to discover that your back-ups are missing crucial files, or simply don't work. Better to discover this before you have a problem so that you can address any shortcomings ahead of time.

RAID is not back-up by Andrew Dacey

Decided to try something new with the blog part of my site. My day job is in IT so I decided to start doing some technology posts with a photography slant. Trying to get into the habit of blogging more often so as part of that I'm going to see if I can make this a weekly feature for the site. I'm going to call this series "Tech Tuesdays". The goal is to have something new posted every Tuesday. For the next couple of weeks I'd like to hit on storage and back-up and how to protect your photos. So with that in mind, I'm kicking this series of with RAID is not back-up. I've seen several cases where people mistakenly thought that they didn't need to back-up their data because they have that data on a RAID system and I wanted to clear up what a RAID is for and why you still need a proper back-up strategy.

What is RAID?

Let's quickly cover what a RAID is. RAID stands for Redundant Array of Inexpensive (or Independent depending on who you ask) Disks. In a nutshell, it's a way of combining a number of disks together for performance or reliability.

There's a number of different styles of RAID (referred to as levels) but the basic idea is that 1 or more of the drives should be able to fail without you losing all of your data (that's where the redundant part comes in). Since photographers tend to have a large collection of photos and would perish the thought of losing them RAIDs tend to be a popular storage solution.

The different RAID levels and how they work is well covered elsewhere so I'm not going to go into it further here. If you need more information, the Wikipedia article on RAID is a good starting point.

Reliability vs. Back-up

The important thing to realize is that RAID is about reliability for keeping a disk system up and running, this is also referred to as high-availability. The point is that a drive can fail and the system will keep running. This is very useful, especially if you're working under a deadline but it's not a back-up.

The purpose of backing up is to have a second copy (or preferably, multiple copies) of your files. If you accidentally delete a file you want to be able to recover it, RAID doesn't offer this. Ideally your back-up strategy should include at least 1 off-site copy of your data, a RAID system doesn't do this. The important thing to realize is that while theoretically the RAID system may contain more than 1 copy of your files it's not stored in a manner that can allow for you to easily retrieve these files. The purpose of a RAID system is to recover all of the data when a drive fails, not for recovering a single lost file.

A warning about RAID 0

There's a specific level of RAID called RAID 0. This RAID level, also called striping, spreads your data across more than 1 disk. However, there is no redundancy in the data. What this means is that if any of the disks fail the entire RAID system will go down, which means you will lose everything on the RAID. That's important enough to repeat, you will lose everything.

RAID 0 is all about performance, not reliability (arguably, at the expense of reliability). If you need that performance then a RAID 0 system can be very fast, but it's important to understand that you're playing with fire unless you have a solid back-up strategy. All hard drives fail at some point and the idea of losing several disks' worth of data because of a single disk failure should be terrifying. I know a lot of people chance it with a single disk in terms of not backing up, do not do this with a RAID 0 system, you will lose your data at some point.

When to use RAID

There's nothing wrong with RAID, just make sure to use it for what it's intended for. RAID can be a great way to create a high capacity back-up system that can also handle 1 or more drive failures. Similarly, RAID 0 can offer performance that simply can't be matched by most single-drive systems, just make sure to keep my warning above in mind. Combine RAID 0 for your main data with a solid back-up strategy and you can have high performance and peace of mind.

In other words, use the 2 for what they're intended for. Back-ups protect your files while RAID protects your disks. If your budget allows for it then combining both options is great. The important thing to remember is that if you have a solid back-up strategy then you can still recover from a total disk failure whereas a RAID on its own doesn't protect you from accidental changes or deletions of files. So if you can only afford one then go for a solid back-up solution first.

Getting a shot out of your head by Andrew Dacey

A bit of a random image this time. This is about a block from my house and a couple of weeks ago when I was on a walk I spotted the wall and the fire hydrant and I just knew I had to shoot it. It's kind of hard to explain but I could just so perfectly see this shot in my mind and I couldn't get it out. At first I went through all of the doubts about if it was even worth shooting and whether I should even bother with it. But, I just couldn't stop picturing it in my mind.

In the end I shot this if for no other reason than to get it out of my head. I got to a point where I knew I just had to get it out or it would keep bugging me. I knew that I had to shoot it and see if I could capture the scene as I'd visualized it. I took the mindset that even if the shot was a complete failure that I could at least try to learn from it.

In the end? I found the original shot a little flat but otherwise it was pretty much as I saw it in my mind. I knew I wanted to crop it wide to really simplify the shot and emphasize the repeating pattern in the wall. At first I thought I'd crop things a little tighter to cut off the bottom of the side-walk and the top of the wall but in the end I decided I liked it better with those included. The one thing I had really hoped to get was a person around the left side of the image. I was hoping to get a good amount of motion blur of the person so they were more of a shape rather than an identifiable person. In the end though it was just too bright to get that kind of a long exposure and I didn't have a neutral density filter to take down the shutter speed. I did take one shot with someone positioned where I had in mind but it just didn't work with their clothes and not being blurred so I went with this shot instead.

As mentioned, the original shot was a little bit flat so I decided to see where I could take it with some post processing. I'm worried that I may have taken this one a little too far and crossed over into the realm of effect for the sake of effect but I've sat with it a few days and am still pretty happy with it. In the end though this was really more about just taking the shot I needed to take. Now that I have it's out of my mind and I've been able to move onto other new ideas. Sometimes that's all an image needs to be.

Backyard BBQ by Andrew Dacey

2011-04-12_backyard-bbq_0020.jpg

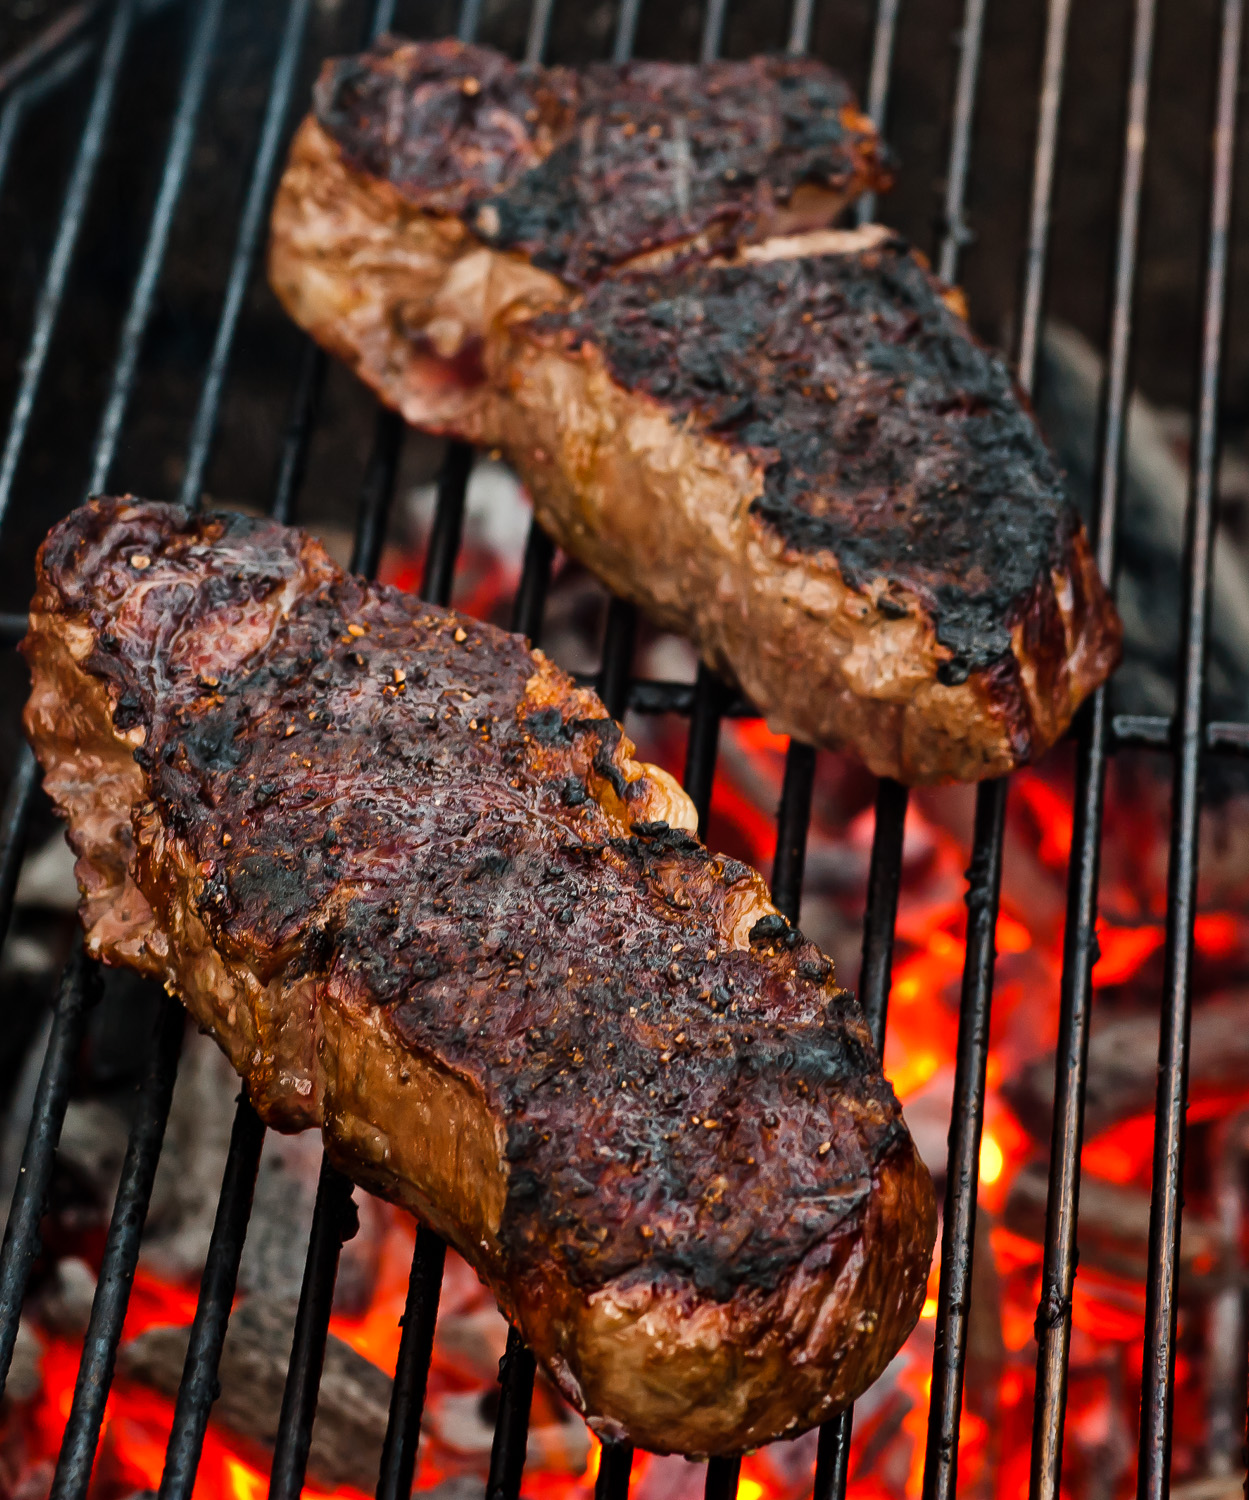
Continuing with my experimenting with food photography I recently took my camera out while grilling some steaks on my Weber charcoal BBQ. All of the food is real, as is the fire. And in case anyone is wondering, I have no relationship with Weber or any charcoal companies. I do happen to think that Weber makes a pretty good grill though.

Again, I used my Tamron 90mm 2.5 macro lens for these shots. I really like getting in close and capturing details of the food and this lens is great for that. It is manual focus though but that's not as much of a drawback when shooting macro photography (or near macro in this case).

What proved to be a bit more of a challenge was using the camera handheld. I was really tired that night and almost didn't take my camera out to shoot the food as it was cooking. In the end though I decided to bite the bullet and try to get a few shots since I'd be out there anyway. But, this meant that I was being a little lazy and didn't take my tripod out. In some ways that was useful as it really allowed me to work quickly but I did also loose a lot of shots due to being slightly off in my focusing since the depth of field is so shallow when working this close.

All of this was shot with natural light, it was in the evening and the sun was starting to go down so I got fairly soft light as my main light. I also really like how the fire adds a nice underglow in a lot of the shots I selected here. I feel this really helps add to the feel. I ended up shooting in continuous low quite a bit for this shoot in order to increase my odds of capturing flames or sparks. I also think this helps improve your chances when shooting macro as slight shifts in movement while shooting can really throw off the focus and shooting continuously really helps improve your odds of getting a few shots that are sharp where you want them to be.

As I think I've mentioned before, it's really important to me to shoot real food and that food be eaten. I really don't approve of the idea of faking the food, especially in a way that makes it inedible. I understand that the goal is to get the best shot but I think the amount of waste just doesn't justify it. I really want to push the idea of "honest" or "real" food photography. Right now that poses some challenges for me though since I'm usually the one cooking the food too. This means that I have to work fast when shooting and also keep an eye on how the food is doing so I don't ruin it in the process (as it's likely to be my supper as well). That also explains why there haven't been any people in my food shots to date. I'd really like to shoot some photos of chefs working and I'm hoping that this practice will help get me ready for that kind of experience as well as give me a body of work to show when I approach someone with the idea.

Making Montreal, pt. 2 by Andrew Dacey

This is part 2 of my how-to series on how I did the post-processing on my Montreal images. If you haven't already read part 1 then I strongly recommend starting there first.

Camera Raw

As mentioned in part 1, the first piece of flexibility you get with this workflow is in being able to re-visit your raw developing settings after you see the effect. This first image shows what the initial effect looked like for this particular image. In this case, I was very happy with the black and white image but I wanted to adjust things after I saw the effect. In this case, I liked what I was seeing in the mix of cold and warm light from taking this shot relatively early in the morning and I wanted to emphasize that further.

Since I was working with a smart object, this is a simple matter of opening the smart object from the layers palette which puts you back into Adobe Camera Raw. The one downside I found with this workflow is that I much prefer working in Lightroom and while the adjustments in Camera Raw are the same the interface isn't so I do find I'm not as efficient working in Camera Raw. In this case though, I simply made some modifications to the saturation for the blues and the yellows.

This produced the second image shown here. Overall, I was happy with the look but I found that in some specific areas things had gotten a little too blue and I wanted to tone that down. Again, I was able to go into Camera Raw and make some adjustments, this time, I used an adjustment brush to reduce the saturation in the areas I wasn't happy with.

While not shown here, I also tried further adjustments to the saturation, vibrance and  colour temperature before arriving at the settings used in this case.  The point is that you still have all of your raw developing tools  available to you. The one caveat is that the preview in Camera Raw will  only show its effects, it won't show the effect of the filter. This  means that sometimes you have to make a change and then hit okay in  order to see what it will look like with the smart filter applied. Once  you get more familiar with what you're trying to achieve and how the  colour and black and white are interacting this will get easier.

Silver Efex Pro 2

For this second image I was happy with the colour in the image but there were some things I wanted to tweak in the black and white conversion after I saw the effect. Again, this is where working with smart filters really comes in handy as you can always get back into the settings and adjust. I find this is much easier than having to undo the filter and then re-apply it, especially if you want to work iteratively by making small changes and seeing the effect. Once you get the feel for the image and how the black and white effect is working with the image you can start targeting the shortcomings more precisely and you may not have to move back and forth as often.

In the case of this image, I was relatively happy with parts of the image but I wasn't happy with the snow in the sky looking too dark (in several spots they were dark grey blobs instead of white flakes) and I felt that the top of the skyscraper was too faded out. In this case, I used Silver Efex Pro's "U-Point" technology to add several control points to adjust this. First, I brought down the flakes in the sky so that they faded away more. After that I darkened the top of the building to make it more prominent. This also had the fortunate side effect of isolating the top of the building from the effect in the sky. After that I worked on adjusting the church to even out the exposures so that it was neither too dark nor too light. I also made some adjustments in the tree on the right side of the image as I felt it was blending in too much with the church and getting lost. Adjusting the black and white conversion helped give the separation I was looking for.

As you can see from the screenshot in Silver Efex, I made significant use of the control points to get to the final image. What's nice is that all of these can be tweaked either in groups or independently. I can also turn off any of the points at any time or delete them entirely. That's definitely one of the huge perks to working with a plug-in that gives this much versatility and control.

As I made such an extensive use of control points in this image I've decided not to include images from every step. Since this is a 3rd party plug-in I also didn't want to get too bogged down in the specifics of using this one plug-in. The point though is that you can adjust the black and white conversion to suit your purposes. In some cases you need to get past the fact that the goal is not necessarily to produce a pleasing black and white image, the goal is to produce a pleasing effect with the colour. In some cases this means making changes to the black and white that don't work for that but do work once the colour is added.

Final Notes

One final note about this if you're working with Lightroom, I highly recommend not making further adjustments in Lightroom after applying this effect. The reason for this is that if you want to go back into Photoshop to adjust your effect later then you won't be able to take these Lightroom edits with you. The reason for this is that if you chose to edit in Photoshop with the Lightroom adjustments then you'll get a brand new image created (as either a TIFF or PSD file, depending on your preferences) which will not retain the smart objects or smart filters from before. Instead, you need to use "edit original" if you want to get back to your original PSD document with these still available. This is a little counter-intuitive and not how you would normally edit images from Lightroom so I wanted to make sure to mention it here.

Making Montreal, pt. 1 by Andrew Dacey

A little later than I'd hoped but here's part one of my promised how-to on how I achieved the "edgy" look I was so pleased with in my Montreal shots. I'm not claiming to have hit on anything new here, but it was something new for me and it really helped achieve my vision for these shots and I felt like I hit on some good workflow items as well in trying to make this process non-destructive. This becomes important because it lets you come back to the image and make adjustments over and over again until you get things just right. In this first image that wasn't as important but in other images I made use of this in order to tweak the look of the effect after I saw the initial result. I hope to cover more of this in a follow-up to this initial post..

I shoot in Raw and it was important that I be able to adjust the Raw development settings after I saw the effect. This meant using smart objects was the way to go. In Lightroom, you can edit an image in Photoshop as a smart object so that's the root that I chose to go. Not only does this allow me to adjust the development settings later (using Adobe Camera Raw in Photoshop) but it also allows me to use smart filters, which as we'll see are another important part of making this a truly non-destructive workflow. If you're not working with a Raw image and will be applying the effect with an adjustment layer (see below) then there's no need to conver the layer to a smart object.

The key to this effect is treating the colour of the image separately from the light and dark values of the image (or the luminance). This involves creating a black and white version of the image which will replace the luminance values of the colour image. I think I originally heard of this technique on one of the photography podcasts I listen to, unfortunately I can't remember which one it was as I heard it some time ago but only thought to try it out when I was working on these images. Since you're treating the colour separately, you don't really need to worry about the overall contrast of the colour image, that will come from the black and white version of the image. That said, I think it's best to work with a colour image that doesn't have a lot of contrast so that you can better see the colour you're working with.

In this case, I was trying out a 15 day trial version of Nik Software's Silver Efex Pro 2 Photoshop plug-in so I used that to create the black and white image. Fortunately, Silver Efex will work as a smart filter. This is one reason why using the Photoshop plug-in is preferable to using the Lightroom plug-in. Previously I'd found that I wasn't very happy with my black and white conversions and I'd noticed a lot of other people seemed to be using Silver Efex so I decided to give it a try and I was extremely pleased with the results. I want to point out that I have no relationship with Nik Software and they have in no way compensated me for saying this. I was so pleased with the trial that I have purchased the Complete Collection.

There's no need to use Silver Efex, if you already have another method of producing black and white images that you're happy with then the effect will still work. In this case I'm using a filter which is why I wanted to use smart filters. If you're using layers or adjustment layers instead then you may not have to use a smart object, although I still recommend doing so if working with a Raw image (see above).

Now you simply need to merge the light and dark values (or luminance) of the black and white image with the colour values from the colour image. This may sound complicated but it's actually just a matter of changing the blending mode to luminance. If we were working with a normal layer or adjustment layer this would just require changing the blending mode next to the opacity slider on the layers palette. Unfortunately, for smart filters it's not nearly as obvious that this can be done but there is a little icon next to the filter that will allow you to adjust this (see the screenshot).

If you are going to use a filter to create the black and white image then I highly recommend using smart filters so that you can adjust that black and white image once you see the final effect. I went for a very contrasty black and white image in this series of images and I think that works for these particular images but it might not in all cases. One thing to remember is that you're taking the luminance values from the black and white image, this means that very dark values in the black and white will tend to show very little colour (they'll be so close to black) and lighter parts of the black and white image will tend to make the colours look more washed out. Similarly, a very light colour in the colour image might start to look a little garish if it's mixed with the wrong luminance value. All of this can be fixed, either on a global level or more locally but that's why it's so important to keep as much flexibility as possible in the workflow.

In part 2 of this series I'll go into this tweaking in more detail and show how I used the flexibility to adjust the image after I saw the initial effect.

Montreal: more exprimentation by Andrew Dacey

2011-02-26_Montreal_0039-Edit-2.jpg

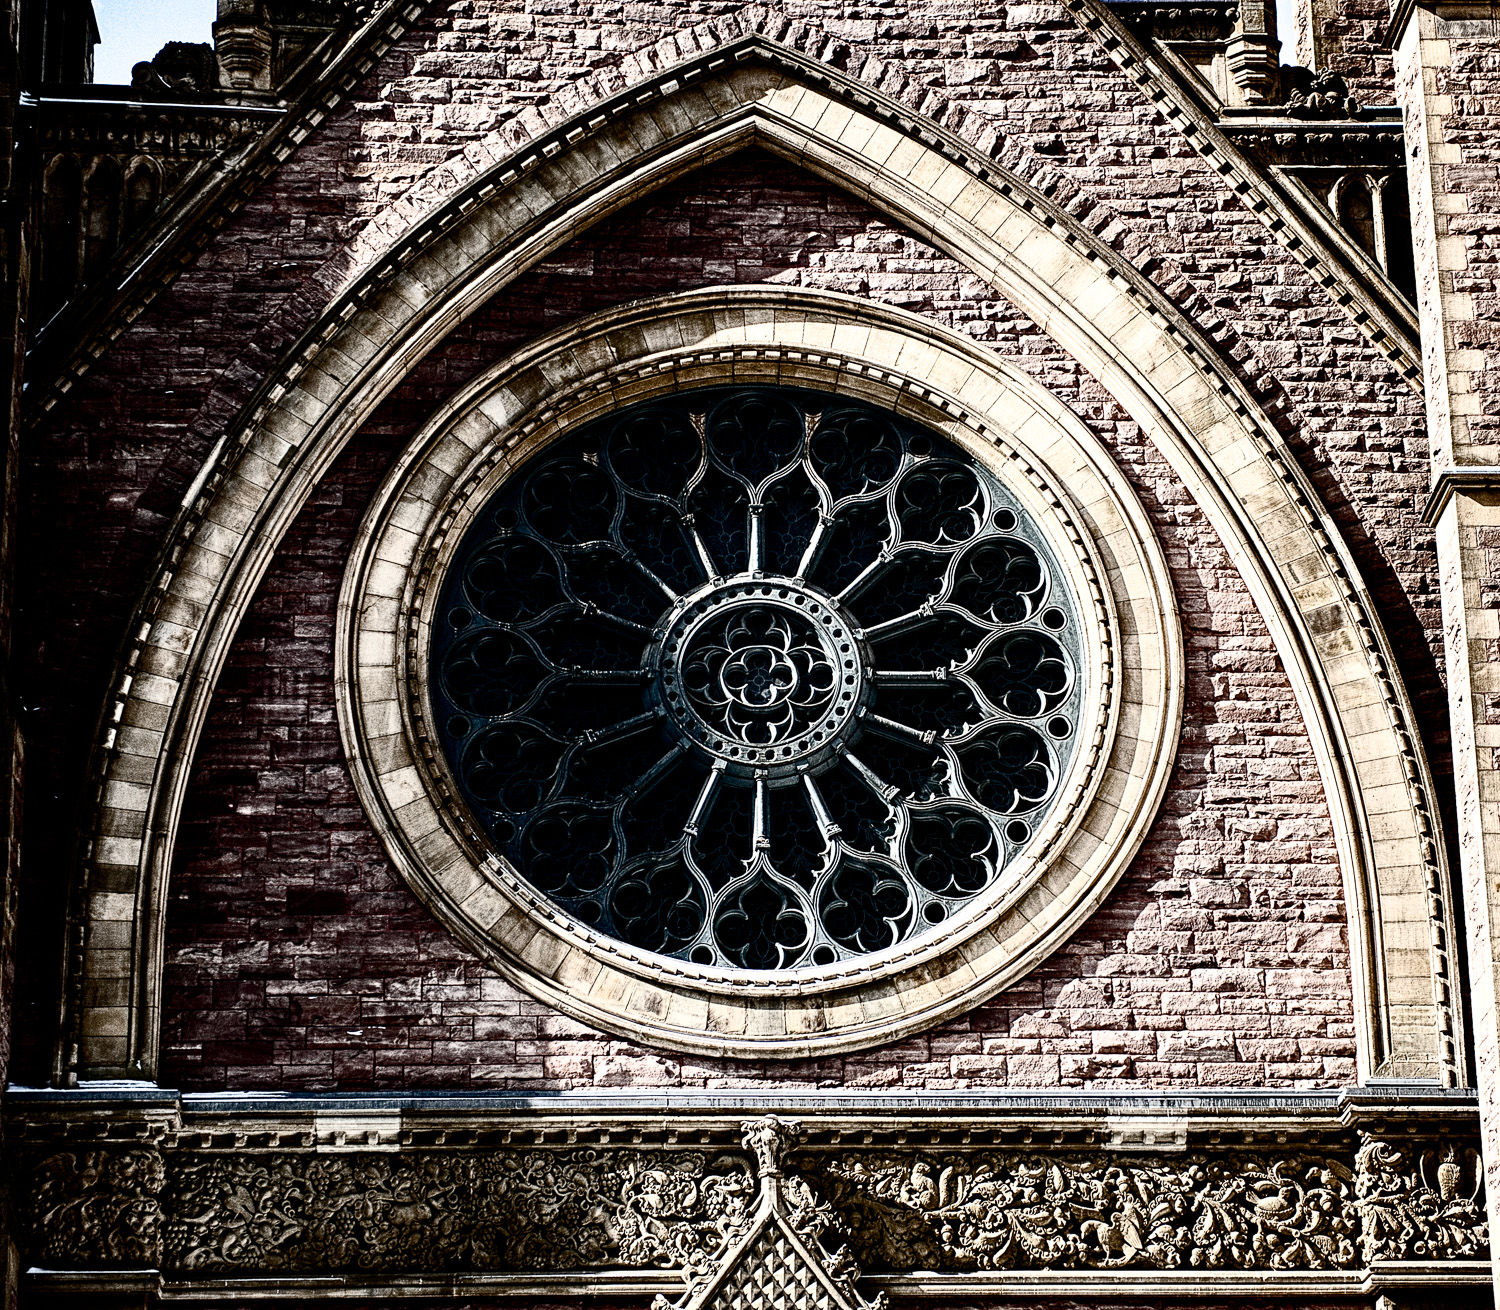
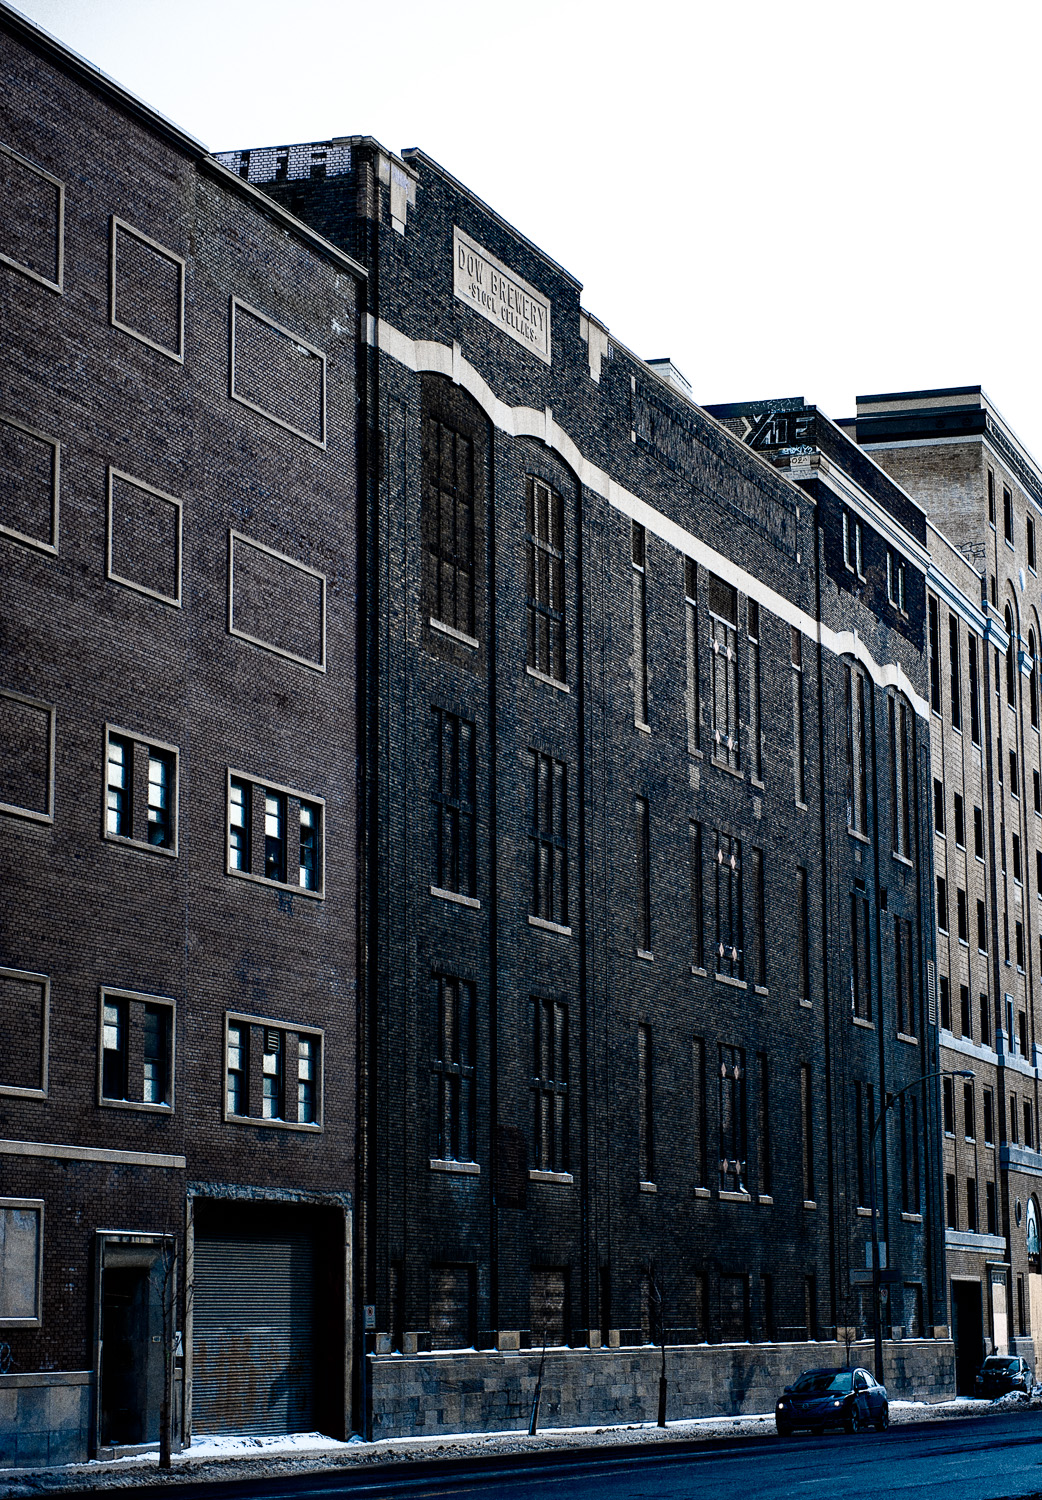
I was in Montreal for a few days around the end of February. While the purpose of the trip wasn't for photo I did manage to grab a couple of shots. I hadn't shared them before as I was struggling with getting a good look that I was happy with.

In the end, I hit on a completely new method of post-processing these images (for me) and I got a very interesting "edgy" look for this photos. What's even more exciting, is that this workflow is still pretty streamlined and completely non-destructive. I can return to these images at any time in the future and completely tweak any aspect of the process quickly and easily. I hope to publish more on this in the next few days. In the meantime, I hope you enjoy these shots.

Experiments in food photography: Coffee by Andrew Dacey

I've been very interested in getting into shooting food and cooking lately. I'm a little late in getting these up, but here's some early attempts from my own kitchen when brewing a cup of coffee in my french press.Overall, for a first effort I'm pretty happy with these. I shot these with my old Tamron 90mm 2.5 macro lens. The lens is an old manual focus Tamron adaptall lens. I used to enjoy using it on my old Olympus OM bodies and was very happy to give it a new life by getting the proper adaptall mount to mount it on my Nikon D700.

One of the things that's very important to me with food photography is that I don't want to waste any food in the process or shoot fake, or otherwise inedible food. Because of this, I had to work very quickly to get these shots while the coffee was brewing (less than 5 minutes) and while the coffee was still hot as I fully intended to drink it.

I tried to get some shots of the kettle while it was boiling the water but I wasn't happy with how the shots of the steam turned out so none of them made the final cut. All in all, a fun experiment and I really hope to shoot more in the future.

Preparing for success by Andrew Dacey

There's the old saying that success happens when preparation meets opportunity (quick Google search attributes this to Henry Hartman). I've been thinking a lot about that lately and both in the ways that I feel I'm doing well and where I'm falling flat. In terms of what I do well is on the technical side. I can be ready to shoot at the drop of a hat. Give me 5 minutes and my gear is ready to go. A lot of this is to do with how I operate after a shoot.

  1. I never really unpack my photo backpack. At most, I'll pull the body out of the bag but that's it. This means most of my gear is ready to go in seconds.
  2. After downloading all my pictures and ensuring that they're backed up to a 2nd location (crucial) I format all my memory cards, this means they're all ready to go again.
  3. I reset the camera to my standard settings if I've adjusted anything for a specific shoot (like using a high ISO)
  4. I recharge the batteries, even if they're not run down

Okay, all of this means that if someone were to call me right now with a shooting opportunity I could be good to go, great.

Now, in the interests of disclosure, let's look at where I fall down. This would mainly be on the business side of things. I've gotten better at preparing model releases before a shoot but there's a lot of other things I still let slide. Right off the bat, I don't have any business cards or a portfolio ready. This means if someone is interested in my photography I really have nothing ready to promote myself, not good.

Earlier this week I did have someone ask me if I had any cards on me and I had to tell them no. Fortunately, this was more for getting in touch with me relating to some shooting I've been doing for them for free so it's not the end of the world but it's not great either.

Tonight, there was an industry event going on at Aperture Studios. I ended up having a schedule conflict and couldn't go but I started realizing that I didn't have anything to bring to that event. Given that I haven't been very active in the local photo community this would have been a great opportunity to network but not having any materials to show doesn't exactly send a good first impression.

I'm not posting this to beat myself up but more to point out that there really is more to the photo business than just taking pictures. It is a business and needs to be run as such. More and more I'm feeling that taking good photos and being good on the technical side just gets you in the door, but it's how you operate as a businessperson that really determines how successful you are, and a lot of that can just come down to how much you prepare.

Workflow: Lightroom to Wordpress by Andrew Dacey

One of the struggles I had with developing my photography website was in getting a really good workflow from Lightroom (my preferred image editing/cataloguing application) to Wordpress (my current content management system for the site). I think I've finally found a good combination of tools that give me a fairly smooth workflow. Lightroom is a great tool for editing and organizing your images. It also has some web export functionality included and LR3 includes publishing services as well. However, I wasn't very happy with the built-in web galleries and I wanted to find something that looked good but didn't rely on Flash.

On the Wordpress side of things, I wanted to find a good way to get my galleries into Wordpress so that I could make use of all the great content management it brings. I've seen plenty of tutorials which simply suggest creating your galleries in Lightroom with the web export functionality and then linking to them from within Wordpress (often while using some type of lightbox effect for the linking). While this does work, your galleries are completely external to Wordpress so you lose a lot of integration.

I began looking into gallery plugins and found that Nextgen Gallery was extremely popular and seemed to offer the features that I wanted. It includes a really nice upload tool and does handle resizing. I played with this for a little while by exporting my images to disk from Lightroom and then using Nextgen's upload functionality to add the images to a gallery, it worked fairly well.

This was a pretty good workflow but I wanted something more automated if possible. With LR3's new publishing services I began to wonder if there was one for wordpress. A search on Adobe's site turned up very new plug-in called Dossier de Presse. What this plug-in adds is an additional set of options to the export command in LR. Wordpress has an XML-RPC funtionality which allows for remote publishing and once enabled, you can use this plug-in to directly publish to Wordpress from within LR. Even better, the plug-in works with either the Wordpress media manager or Nextgen Gallery.

There's still a little bit of manual work at the very end to get things exactly how I like them but it's very smooth. Here's a quick outline of how it works:

  1. Select my images in LR and go to export
  2. Select Dossier de Presse as the destination (I've saved this as a preset)
  3. Rename the gallery name (I usually create a new gallery each time, but you can update an existing gallery as well).
  4. Hit export
  5. In Wordpress, update any details on the page (the plug-in is still very new so there's a few things I still tweak manually after creating the page)
  6. Publish the page
  7. Add the page to my menu (Wordpress 3.0's new menu manager makes this very easy)

I know that probably looks like a lot but in action most of this goes extremely quickly and in the end I have a page and a gallery both within Wordpress itself so then I can manage it from there.

The final tweak I made was to update the effect I was using for Nextgen. After some other experimentation I seem to have settled on the Fancybox for Wordpress plug-in. This worked out of the box with Nextgen but I have adjusted the settings so that Nextgen adds a rel element to gallery images and Fancybox only groups images with the same rel (these are both easily setup in the settings for the plug-ins). I set this up so that I can control when images group if I have multiple images on the same blog post.

New Gallery: Newfoundland 2010 by Andrew Dacey

2010-07-04_nfld-2010_14-1.jpg

In early July my girlfriend and I visited her parents in western Newfoundland.

I was very prolific in my shooting, coming back with 373 images. I've finally managed to cut that down to a reasonably sized gallery.

I don't often get the opportunity to shoot much landscape photography and I'm really pleased with how these shots turned out.

I'm also experimenting with a new way of displaying the gallery, I'd be interested to hear how people feel the thumbnails with lightbox effect works compared to the thumbnails beneath the full-size image. One nice feature is the lightbox effect I'm using (Fancybox) seems to be handling automatic scaling pretty well (for me at least) so I'm thinking that may solve some of the scrolling problems I was seeing with earlier galleries and vertical shots. If this works out well it's fortunately a very easy change to adjust the other galleries.

Check out Newfoundland 2010 and let me know what you think.